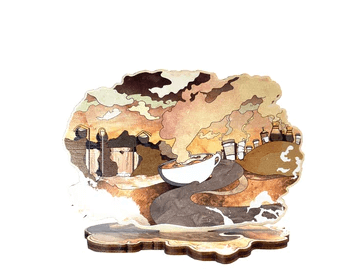
These Rainbow Acrylic Standees are a great way to showcase your design on a large scale and are perfect for displaying on desks, shelves, or even on the fridge. You can get these standees from the vograce by uploading your custom style on their website. Also, they have some great wood standee offers. Here’s how to make one!
Choose Your Uprights
First, pick a base color and decide on a cut line. This is crucial in ensuring your design doesn’t lift off the table as it is cut. Manufacturers offer a variety of pre-cut bases to choose from, including our signature rainbow plexiglass option. Alternatively, you may opt for a blank canvas. Selecting a design that matches your theme and decor is a good idea for the best results. This will ensure you end up with a piece of art you’ll be proud to display.
You’ll also want to choose your uprights carefully. Using the Vograce template as a guide, you’ll be fine with identifying the right ones for your project. Choosing uprights with a similar height is also a good idea. This will reduce the chances of your design snagging on something intrusive and making it unusable.
Create Your Artwork
When creating your artwork, you’ll want to add a base layer to ensure your colors are clear and vibrant. Adding a base layer is simple and will help ensure that any areas of your design that don’t have a white background will appear transparent.
Generally, you can create your design in any program that supports layers. You can also use an online program like Adobe Illustrator or Inkscape.
After importing your image, you must place it onto your canvas in the right position. Once you’ve done that, you can start to paint.
When creating your standee, it’s important to remember that you’ll be printing your designs on the back of the acrylic. Once you’ve placed your ‘Artwork B’ layers onto your artwork, you should flip the standee over so that your design is the correct way around and is visible via the’ front’ of the acrylic.
Add a Base Layer
For a double-sided design, you’ll need to add a base layer of white to your artwork. This will help your colors to print crisper and more vividly.
You’ll also want to add a border and cut line to your design, which will help prevent the printed area from lifting along the edge of the acrylic when the laser heats up. Make sure to add a border at least 1mm wider than your design.
If you’re creating a double-sided design, you’ll also need to place the artwork for the back of your standee on the ‘Artwork B’ layers. These will sit on top of your ‘Artwork A’ layers and should perfectly match up. If you’re unhappy with this, please let them know, and they can fix it for you.
Alternatively, you can send vograce the original jpg file of your artwork. They’ll print it onto the clear acrylic to create your double-sided standee. Note that your design will be mirrored, so you’ll need to be sure it lines up correctly and has no ‘wavy’ edges.
You can put your company’s logo and website address on the front of your rainbow acrylic standee. This will help potential customers to identify your business more easily and encourage them to engage with your social media channels. You can also include a QR code, allowing visitors to access a digital menu by clicking on the code. This is a great way to keep the line moving and attract new customers!
Add a Border / Cut Line
A border cut line can do wonders for the overall image quality of your finished product. This is especially true of larger formats like our double-sided 6″ tall acrylic standees and those of you with a big honkin’ printer. Choosing your cut line carefully is a good idea, especially if you have opted for the laser cutter route! Adding a 1mm border, not the same as your print lining, is a good idea to ensure a tight and sharp cut. Adding a border will also ward off any unwanted splinters and dents that may occur due to our clumsy cutting. Be sure to keep a close eye on your work at all times! Seeing what you’ve done when surrounded by plastic can be hard!
Flip It
Flipping your image is a great way to change the mood of your design. This will make your artwork stand out and create a memorable effect.
To flip your image, place it on a new layer in Photoshop and then enter free transform mode. This will enable you to manipulate the layers of your design freely, which is a great advantage.
In addition, you can use this feature to rotate the image or add a second layer to it. This will allow you to add a different design or color to your standee, which is a fantastic way to customize your product.
Once you have placed the image on the layer, you can use the ‘Flip Canvas Horizontal’ menu to flip it over. This will use the central line of the image running from top to bottom and flip it across this point; objects on the left will be on the right, and vice versa.
You can also use this feature to flip an individual item, such as a logo or text. This will ensure that the design is in the correct direction and is a great way to get it back into alignment after your printing process has finished.
Final Words
Here we have told you rainbow acrylic standee. If you create a double-sided standee, you must ensure that your A-side and B-side artwork is lined up correctly. Similarly, it works on wooden pins. This will ensure that the design is mirrored on the back of the standee and is seen via the ‘front’ of the acrylic.
If your design isn’t flipping the way you would like it to, you may need to adjust the angle of the artwork or the text if it doesn’t align properly with the image. Alternatively, please copy the text onto a new layer before flipping it over.