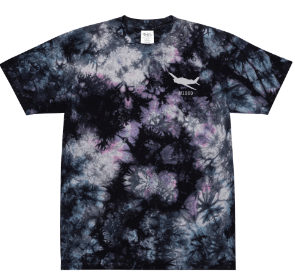
How to Create Your Own Custom Tie Dye Shirts

Are you looking for a fun DIY project that will add some personality to your wardrobe? Look no further than custom tie dye shirts! Not only are they easy and affordable to make, but they also allow you to show off your unique style. Whether you’re a seasoned crafter or just starting out, this step-by-step guide will help you create your own one-of-a-kind tie dye shirt that is sure to turn heads. So grab your supplies and let’s get started on creating the perfect addition to your closet!
Choose your fabric
When it comes to tie dye, the type of fabric you choose can make a big difference in how your shirt turns out. Generally speaking, natural fibers work best for tie dyeing because they absorb the dye more easily and create vibrant colors.
Cotton is by far the most popular choice for tie dye projects due to its versatility and affordability. Plus, cotton shirts are comfortable to wear and hold up well over time. However, if you’re looking for something a bit dressier or with a different texture, consider using silk or rayon instead.
Keep in mind that not all fabrics are created equal when it comes to absorbing color. For example, polyester blends may not take dye as well as pure cotton or silk fabrics do. So before you start your project, be sure to read the care tag on your garment and do some research on which fabrics will work best with your chosen dyes.
Ultimately, choosing the right fabric will set you up for success when creating custom tie dye shirts that look great and last long!
Pick your colors
When it comes to tie dye shirts, the colors you choose can really make or break your design. So, how do you pick the perfect hues for your custom creation?
Firstly, consider what kind of look you’re going for. Do you want something bright and bold, or something more subdued? Pastels are a great choice if you’re aiming for a softer look, while brighter shades like fuchsia and turquoise will give your shirt some serious pop.
Another factor to consider is whether you want to use complimentary or contrasting colors in your design. Complimentary colors sit opposite each other on the color wheel (think red and green), while contrasting colors are next to each other (like blue and green). Both options can create striking results – it just depends on what effect you’re after.
When picking your colors, don’t be afraid to experiment! Tie dye is all about having fun with color combinations and trying out new things. If something doesn’t turn out quite right the first time around, simply adjust your technique or switch up your palette until you get the desired result.
Ultimately, choosing the right colors is all about trusting your instincts – so go ahead and let those creative juices flow!
Make your designs
Now that you have picked your colors and fabric, it’s time to create your designs. The possibilities for tie dye patterns are endless, so get creative and experiment with different techniques.
One classic design is a spiral pattern. To achieve this look, lay your shirt flat and pinch the center of the fabric with your fingers. Twist the fabric around the center point until it forms a tight spiral shape. Use rubber bands to secure the fabric in place.
Another popular method is called “scrunching.” Simply bunch up small sections of the shirt randomly and secure them with rubber bands or string. This creates an abstract, textured effect when dyed.
If you want more precise designs, try using stencils or tape to block off certain areas before dyeing. You can also use a paintbrush to apply dye directly onto specific parts of the shirt for more controlled color placement.
Remember to be patient and take your time when creating your designs – rushing can lead to messy results. And don’t be afraid to mix and match different techniques for a truly unique custom tie-dye shirt!
Dye your shirt
Now that you have created your custom designs, it is time to dye your shirt! It is important to prepare your work area and wear protective clothing such as gloves and an apron.
First, fill a large bucket or basin with hot water and add the dye according to the package instructions. Stir well until the dye is fully dissolved in the water.
Next, place your shirt into the dye bath and use tongs or gloved hands to move it around gently for even coverage. Make sure all areas of the fabric are submerged in the liquid.
For more intricate designs or multiple colors, consider using squeeze bottles or spray bottles filled with diluted dye solutions. Apply them directly onto specific areas of your shirt.
Once you are satisfied with how much color has been applied, remove your shirt from the dyebath and rinse it thoroughly under cool running water until no more excess color comes off.
Wash and dry your newly dyed custom tie-dye shirt separately from other clothes in cold water on a gentle cycle before wearing it proudly!
Wash and dry your shirt
Once your custom tie dye shirt is finished, it’s important to wash and dry it properly before wearing. Washing the shirt will help set the colors in place so they don’t bleed or fade over time.
To start, rinse your shirt thoroughly with cold water until the water runs clear. This will remove any excess dye that may not have adhered to the fabric during the dying process.
Next, wash your shirt in cold water with a mild detergent. Avoid using bleach or any fabric softeners as these can damage both the fabric and color of your tie dye design.
After washing, hang or lay flat to air dry. It’s best to avoid using a dryer as high heat can cause shrinkage and fading of colors.
If you do need to use a dryer, opt for a low heat setting and toss in some clean towels. The towels will help absorb excess moisture while also preventing any potential bleeding onto other clothes.
By following these simple steps for washing and drying your custom tie dye shirt, you can ensure that it stays vibrant and colorful for years to come!
Wear and enjoy your new shirt!
Congratulations on creating your very own custom tie dye shirt! Now it’s time to show off your masterpiece to the world. Pair it with jeans, shorts, or a skirt for a fun and unique look.
Remember to always follow the washing instructions provided by the dye manufacturer to ensure that your design stays vibrant and doesn’t fade over time.
Creating custom tie dye shirts is not only a fun activity but also a great way to express yourself through fashion. So gather some friends, pick out some colors, and let your creativity run wild!
We hope this guide has been helpful in creating your own one-of-a-kind shirt. Remember, there are no rules when it comes to tie-dyeing so have fun experimenting with different techniques and designs. We can’t wait to see what you come up with!


