If you are in market for new jacket, but don’t want to fork over a ton of cash, consider making one yourself. This DIY project only takes around 30 minutes, resulting in a custom-made jacket that will look amazing and keep you warm. Here are five tips to ensure your jacket turns out perfect: 1. Choose a comfortable and weatherproof fabric. 2. Cut out the sleeves and bottom of the jacket using tailor’s measurements. 3. Sew on buttons and zippers where needed. 4. Finish off the jacket with a hem and belt if desired. 5. Let your jacket air dry for two to three days before wearing it out!
What You’ll Need
-A piece of fabric measuring 42″ wide by 18″ long
-One pair of scissors
-A sewing machine
-Thread
-Pins/needles
-Iron or sewing press
How to Make the Jacket
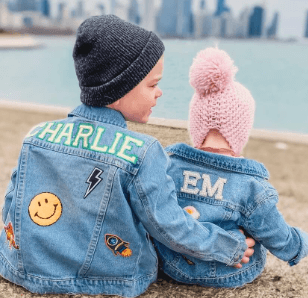
If you’re looking for a unique piece of clothing to add to your wardrobe, consider making a custom Jean jacket. This easy project can be done in minutes, and looks great on any body type.
To make a custom Jean jacket, you’ll need:
- A jean jacket (either new or used)
- A sewing machine
- Thread
- A zippered pocket
- A hemming tape measure
- Iron and ironing board
- Turn the jean jacket inside out so the inside faces outwards.
- Measure around the chest and arms of the jacket from shoulder to shoulder, then multiply that number by 2.14 (to get the total measurement in inches). For example, if you measured around the chest of the jacket and it was 32″ wide, your number would be 432″. Next, cut out this number with scissors or a rotary cutter on heavy paper so that it’s approximately 1″ larger than your actual jacket measurement (so for example if your measurements were 432″ and 1″, your cutout would be 433 1/2″). Make sure to leave enough fabric to sew around all four sides of the cutout. If you only have enough fabric for two sides (like I did), simply taper each side of your cutout towards the top by about 1/4 inch until there’s just enough left over to sew along both edges of
How to Sew the Jacket
Regarding fashion, there are a few things that all sewers can agree on – namely, that a good jacket makes any outfit look better. With many different styles and colors available today, creating your custom jacket is a great way to stand out.
You’ll need a few things before getting started: a basic sewing kit, including thread, needles, and fabric; and a pattern for your desired jacket style. Once you have these items ready, it’s time to start sewing!
To begin, cut out the pattern pieces according to the instructions provided. Next, trace around each piece onto your fabric using a lightbox or tracing paper. Take care not to stretch or shrink the fabric while tracing – this will result in inaccurate measurements. Ensure all lines are lined up perfectly before cutting out the fabric pieces.
Now it’s time to start construction! First, sew the front and back pieces along the sides and then fold over the hemline. Sew along the edge of both layers to create an envelope shape. Then press down firmly with your iron to finish off the seam allowances.
Next, stitch together the side panels using bias tape if desired (or leave them un-taped). Afterward, line up one side of each panel with one edge of the envelope shape and press down evenly along both edges with your iron. Stitch together both ends of the panels using a zigzag
Tips for Making a Custom Jean Jacket
Following tips will help you make custom Jean Jacket in just minutes:
- Choose your fabric.
- Sketch your design.
- Cut out the pieces and sew them together.
- Trim the seams and hem the jacket.